If you’re looking to cut energy costs and take control of your home’s temperature from anywhere, the Emerson Sensi Touch smart thermostat is worth considering. This guide walks you through everything you need to know, from checking compatibility with your existing HVAC system to installing the device and connecting it to your smartphone. Whether you’re upgrading from a decades-old dial thermostat or replacing a programmable unit, you’ll find straightforward steps and practical advice to get your smart thermostat running smoothly. No contractor needed for a straightforward installation, though we’ll flag situations where professional help makes sense.
Table of Contents
ToggleKey Takeaways
- The Emerson Sensi Touch smart thermostat enables remote temperature control via smartphone and voice commands while learning your usage patterns to optimize energy efficiency.
- A C-wire (common wire) is essential for continuous power; if your system lacks one, you’ll need a power extender kit ($25–40) or professional installation assistance.
- Verify WiFi signal strength (at least –70 dBm), compatible HVAC wiring, and check for obstructions before installation to avoid costly mistakes.
- Homeowners typically see 10–15% energy savings in the first year with the Sensi Touch when consistently using scheduling and geofencing features.
- A straightforward DIY installation takes a few hours with basic tools—just photograph existing wire connections, turn off power at the breaker, and follow the color-coded wiring diagram before connecting to your smartphone app.
- Geofencing and energy reports help identify heating or cooling patterns, while smart home platform integration through Alexa, Google Assistant, and Apple HomeKit adds voice control convenience.
What Is the Emerson Sensi Touch Smart Thermostat?
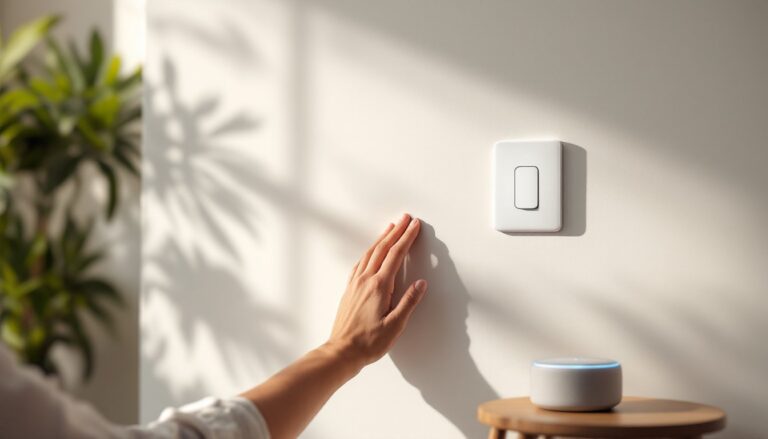
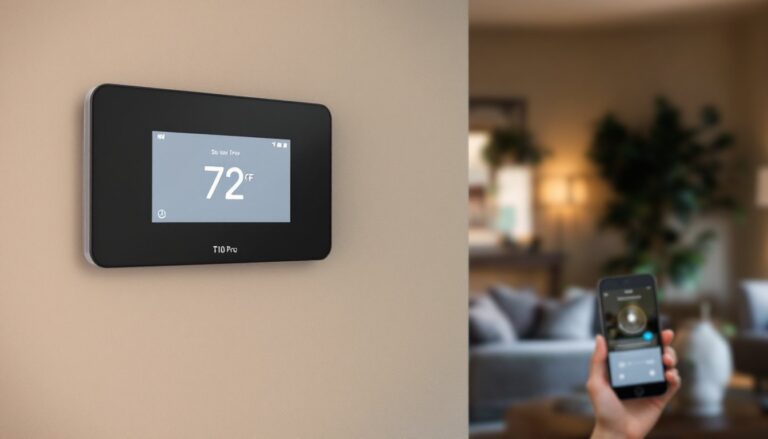
The Emerson Sensi Touch is a WiFi-enabled smart thermostat that replaces your existing wall-mounted unit and lets you manage heating and cooling remotely via smartphone, web browser, or voice command. Unlike old programmable thermostats that run on a fixed daily schedule, the Sensi Touch learns usage patterns and adjusts settings automatically, or you can override it anytime. The device displays current temperature and humidity on a 7-inch color touchscreen, making it easy to read and adjust from across the room. It works with most standard HVAC systems, furnaces, air conditioners, heat pumps, and hybrid setups, though you’ll need to verify compatibility before purchase. This is a cosmetic upgrade in most cases, meaning no permit is required for installation, though you should turn off power at the breaker before working with existing wiring.
Key Features and Smart Home Integration
The Sensi Touch pairs with popular smart home platforms like Amazon Alexa, Google Assistant, and Apple HomeKit, letting you adjust temperature using voice commands without touching the thermostat. Geofencing learns when family members leave and arrive home, automatically switching between heating and cooling modes to avoid wasting energy on an empty house. Energy reports show daily and monthly usage trends, helping you identify patterns and adjust behavior, a simple way to spot if your system is running longer than expected. The device also sends alerts if temperatures fall outside your set range, useful for detecting furnace failures or frozen pipes in winter. Real-world integration through smart home automation platforms shows that homeowners typically see 10–15% energy savings in the first year, though actual results depend on your climate, system efficiency, and how consistently you use scheduling features.
Installation Requirements and Compatibility Check
Before buying or installing a Sensi Touch, verify three things: your WiFi signal strength at the thermostat location, your current wiring configuration, and whether your HVAC system is compatible. The Emerson Sensi app includes a compatibility checker tool that walks you through your existing thermostat’s wire connections, most homes have standard heat, cool, and fan wires, but some older systems use different configurations. You’ll need a C-wire (common wire) to power the touchscreen continuously: if your current system lacks one, installation becomes more involved and may require running new wire or installing a power extender kit (around $25–40). Most homes built after 1980 have adequate wiring already in place. Check that your WiFi network reaches your thermostat location with at least –70 dBm signal strength: if it doesn’t, move your router closer or add a mesh WiFi node to extend coverage. Many smart home enthusiasts find detailed device reviews and setup guidance invaluable when planning integration with existing systems.
Step-by-Step Installation Process
Preparing Your System and Safety First
Before touching any wires, turn off power to your HVAC system at the main breaker and verify power is off using a non-contact voltage tester (around $15–25). Take clear photos of your old thermostat’s wire connections, snap at least two angles so you can reference them during installation. Most old thermostats have a label inside the cover showing which wire connects to which terminal (H for heat, C for cool, G for fan). Write down the wire colors and terminal positions on paper: this is non-negotiable and takes only a minute. If you’re uncertain about your wiring, hire an HVAC technician for the hour needed to pull and photograph the existing setup, $100–150 is well worth avoiding a reversed connection that could disable your heating or cooling.
Gather your tools: Phillips screwdriver, flathead screwdriver, wire strippers, electrical tape, a level, and a battery-powered drill if mounting requires wall anchors. Wear safety glasses to protect against wire clippings and dust when removing the old thermostat. Avoid working alone if possible, one person can hold the wires steady while another positions the base plate.
Wiring and Physical Installation
Remove the old thermostat’s faceplate and carefully pull it away from the wall, then loosen the terminal screws and disconnect each wire one at a time, immediately taping and labeling it with the terminal position it came from. Set the old unit aside. Check the wall opening for obstructions, old wires, cables, or drywall dust, and clean it out so the new base plate sits flush against the wall surface.
Using a level, mount the Sensi Touch base plate on the wall at standard thermostat height (typically 48–60 inches from the floor) and secure it with the provided fasteners or anchors if your wall lacks a backing board. Connect your labeled wires to the corresponding terminals on the new base, red to Rc (cooling call), white to W (heating), green to G (fan), and black to C (common). Insert a small flathead screwdriver into each terminal screw, tighten gently so wires don’t pull loose under tension, and tug each wire to confirm it’s seated. Double-check every connection against your labeled reference before proceeding. Attach the touchscreen faceplate to the base using the provided clips and secure fasteners: it should sit level and flush against the wall.
Restore power at the breaker, wait 30 seconds for the device to boot, and confirm the startup screen appears on the display. If nothing shows, turn the breaker off, wait 2 minutes, and try again, occasionally the device needs a full power cycle to initialize. Navigate to WiFi settings in the menu, scan for your home network, and enter your password. Follow the setup wizard to pair with your existing heating and cooling equipment, which involves selecting furnace and air conditioner models if they’re recognizable, or letting the system auto-detect when you run a brief test cycle. This auto-detection typically takes 15–20 minutes and saves you from digging up equipment serial numbers.
Getting Started With App Setup and Control
Download the Emerson Sensi app on your smartphone (iOS or Android), create an account, and add your thermostat by scanning the QR code on the device’s rear panel or entering the serial number manually. Once linked, the app displays current temperature, set point, and system status in real time. Configure geofencing by enabling location services and setting the app to trigger heating or cooling when the last person leaves or the first person arrives home, test this feature with a manual departure to ensure alerts and temperature changes work as expected.
Set up schedules within the app if you want automatic adjustments on specific days and times: many users create a weekday schedule (lower temps while away, higher when home) and a weekend schedule (later wake time, different comfort level). Voice control integrates with Alexa, Google, or Apple Home after you link your Emerson account to the respective smart home platform, usually a 2-minute setup in each platform’s app. Install security camera or smart doorbell integration if desired, allowing your thermostat to respond to detected activity (e.g., “if motion detected, resume normal schedule”). The energy dashboard updates daily and shows how your recent behavior compares to previous weeks, helping you spot seasonal changes or equipment issues early. Comprehensive smart home buying guides often cover integration best practices and troubleshooting common WiFi or automation conflicts that DIYers encounter post-installation.