Smart door locks have become practical additions to homes over the past few years, shifting beyond luxury gadgets into everyday convenience tools. A smart door lock installation is a project most homeowners can tackle without calling a locksmith, typically taking 30 minutes to two hours depending on your existing lock and comfort level with basic tools. This guide walks you through the process step-by-step, from choosing the right lock to pairing it with your smartphone, so you’ll know exactly what to expect before you start.
Table of Contents
ToggleKey Takeaways
- Smart door lock installation is a manageable DIY project that typically takes 30 minutes to two hours, eliminating the need for a professional locksmith.
- Before purchasing, verify your door’s thickness and deadbolt backset (2 3/8-inch or 2 3/4-inch) to ensure compatibility with your chosen smart lock model.
- Proper preparation—including accurate measurements and careful removal of your existing lock—is crucial for a smooth smart door lock installation without damaging your door.
- Test all functions immediately after installation, including lock/unlock via the app, PIN code entry, and activity log notifications, to catch any alignment issues early.
- Integrate your smart lock with home automation systems like Alexa or Google Home for voice control, remote access, and the ability to create temporary codes for guests and service providers.
- Monitor battery levels regularly (most models alert you at 10–20% capacity) and keep extra AA or AAA batteries on hand for quick replacements.
Why Upgrade To A Smart Door Lock
A smart door lock eliminates the need to fumble for keys, lets you grant temporary access to guests or service providers remotely, and provides a log of who entered and when. You’ll also get notifications whenever the door is unlocked, adding a security layer to your peace of mind.
Many models integrate with home automation systems like Amazon Alexa, Apple HomeKit, or Google Home, letting you lock or unlock your door with voice commands or from anywhere you have internet access. Some smart locks also act as a bridge for other smart home devices, so installing one can be the first step toward broader automation.
Before upgrading, check that your existing deadbolt setup is standard. Most residential doors use a 1 3/8-inch to 1 3/4-inch thick door with a standard deadbolt hole (typically 2 1/8 inches in diameter). If your door is thicker, you may need an extension kit (usually included or sold separately). Older homes sometimes have non-standard configurations that require a professional locksmith, so measure your setup first.
Tools And Materials You’ll Need
Tools:
• Phillips and flathead screwdrivers (a cordless drill with bits works, but manual screwdrivers give you better control in tight spaces)
• Measuring tape
• Pencil for marking
• Drill with small bits (for pilot holes, optional but recommended for some models)
• Utility knife
Materials:
• Your chosen smart lock system (deadbolt or lever-style: check your door and preference)
• Batteries (usually AA or AAA, depending on the model, buy extras)
• Wooden shims (thin wedges to help with alignment, especially if your door frame is slightly out of plumb)
• Caulk or weatherseal (optional, to prevent water entry around the exterior component)
Before you buy, verify that your smart lock fits your door configuration. Most modern smart locks work with standard backsets (2 3/8-inch or 2 3/4-inch distances from the door edge to the center of the deadbolt hole), but some older locks use different spacing. Check your current lock’s packaging or measure the backset yourself with a tape measure to avoid a frustrating mismatch.
Reviewing comprehensive smart lock comparisons can help you understand which models suit different door types and smart home ecosystems.
Preparing Your Door For Installation
Preparation is where most DIY lock installations succeed or stumble. Take your time here, and you’ll breeze through the actual swap.
First, measure the thickness of your door at the lock location. Use your measuring tape to confirm it falls within your smart lock’s specs. Open the door and look at the existing deadbolt from both sides, you’ll see the interior mechanism and the exterior escutcheon (the metal plate surrounding the bolt).
If your door has decorative trim or a security plate around the existing lock, note how it’s positioned. You may need to reuse or replace it, depending on your new lock’s design.
Removing Your Existing Lock
Unlock your current deadbolt and open the door fully. From the inside, locate the set screw on the interior mechanism (it usually sits near the keyhole). Turn it counterclockwise with a screwdriver until it’s loose, then pull the interior knob or lever straight toward you, it should slide out easily.
Once the interior piece is free, go to the outside and unscrew the exterior escutcheon (the metal trim ring). It typically has two small screws, one on top and one on bottom, though some models have one centered screw. Keep these screws in a small container: you’ll likely need similar fasteners for your new lock.
Now the deadbolt body itself is exposed. Look for a screw on the interior side of the lock body (or a retaining ring if it’s a rim-style lock). Remove it, then push or pull the bolt mechanism out from the door edge. If it’s stuck, a gentle tap with a rubber mallet helps, but don’t force it, you’ll damage the door.
Wipe the bolt hole clean with a dry cloth. If the hole is damaged or oversized, you can fill it with wooden toothpicks and carpenter’s glue, then re-drill once it’s dry, though most new smart locks account for standard holes and will cover any minor gaps with their exterior plate.
Installing Your Smart Door Lock
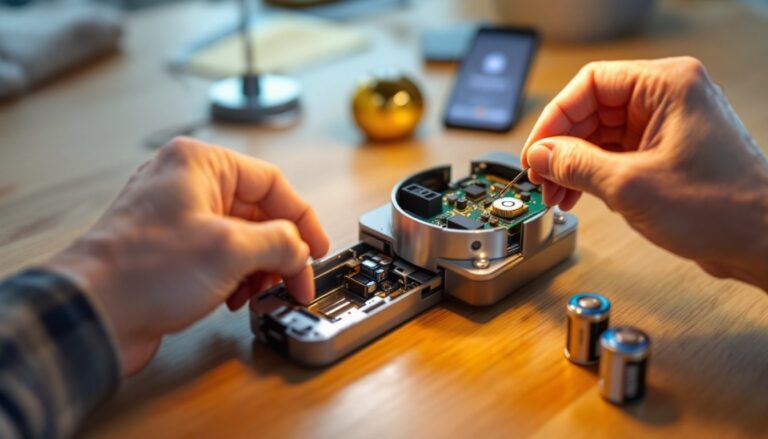
Before touching anything, install the batteries in your smart lock’s interior mechanism (or control module) according to the manufacturer’s instructions. This ensures you can test connectivity before it’s fully mounted.
Check your smart lock’s manual for the correct orientation, most deadbolts have a specific “up” position for the bolt’s throw. Some models also include a small alignment tool or mark to show the correct facing. Use a pencil to lightly mark this position on the door edge so you know which way the bolt should point.
Carefully feed the deadbolt body through the hole from the inside, making sure the bolt’s throw aligns with the strike plate on the door frame (the metal piece that catches the bolt when you close the door). If your door frame is slightly warped, use a wooden shim behind the deadbolt body to level it, most installations include a small metal shim plate, which you’ll screw in place.
Mounting The Interior And Exterior Hardware
Once the deadbolt body is in place, screw it into the door edge using the fasteners provided. Tighten firmly but don’t over-torque: you can strip the threads or bend the escutcheon. Check that the bolt slides smoothly in and out, if it binds, loosen the screws slightly and re-align.
Now slide the interior mechanism onto the bolt’s spindle (the rod connecting the inside and outside), making sure it’s oriented correctly (the keyhole should face down or to the side, per your lock’s design). Tighten the set screw until the mechanism is snug, then test the bolt again, it should turn smoothly with the interior knob or lever.
Move to the outside and slide the exterior faceplate over the bolt protruding from the door. Attach the trim ring or escutcheon with the screws provided. Again, tighten snugly but don’t over-tighten: an over-tight faceplate can warp it and cause the exterior control (keypad, touchscreen, or traditional key) to stick.
Many modern smart locks come with a sleek exterior component (keypad, button, or touch panel) that mounts in front of the escutcheon. Install this according to the manual, typically, it’s held by small clips or screws that align with the faceplate. Make sure wiring (if any) is routed carefully and not pinched.
Test the lock from both sides: push the interior lever or button, and verify the bolt retracts fully. Press the exterior button or enter a code, and check that the mechanism responds. If anything sticks or makes grinding noises, stop and re-check your installation, don’t force it.
Connecting And Setting Up Your Smart Lock
Most smart locks today use Bluetooth or Wi-Fi to communicate with your phone. Some require a separate bridge device (a small hub that connects to your router) for remote access: others connect directly to your phone when you’re within Bluetooth range.
Download the lock manufacturer’s app on your smartphone and create an account or sign in. Follow the in-app setup prompts to pair your lock. This typically involves enabling Bluetooth on your phone, holding it near the lock, and confirming the pairing. The app will usually walk you through setting a user code or PIN for keypad entry.
Once paired, test all functions: unlock and lock via the app, try your PIN code on the exterior keypad (if equipped), and check the activity log to confirm the app is receiving notifications. If you’re integrating with a voice assistant like Alexa or Google Home, open that app, search for your lock within the smart home settings, and authorize the connection.
Set up any automations you want, such as unlocking the door at a scheduled time or receiving notifications when someone enters. Many locks also let you create temporary codes for guests or delivery personnel, a feature that’s more secure than hiding a spare key and easier than coordinating physical access.
Familiarize yourself with the lock’s battery status indicator. Most models send an app notification when batteries are low (usually at 10% or 20%), and many use standard AA or AAA batteries, making replacements simple and affordable. Quality smart lock reviews often highlight battery longevity, so check your model’s expected runtime before purchase.
If your smart lock includes optional features like a video camera, a second key card, or a manual key backup, install and configure those now. For doors with a smart video doorbell setup, ensure your smart lock’s notifications won’t flood you with duplicates: configure the app’s notification settings to your preference.
Secure the interior escutcheon and any visible wiring with caulk or cable clips if desired, keeping water away from electronics. This is especially important for exterior components in rainy climates. Finally, close your door, lock it from both the outside and inside, and try unlocking it again, the whole cycle should feel smooth and responsive.