If you’re tired of manually adjusting your thermostat or watching your heating and cooling bills climb month after month, a T5 smart thermostat might be the upgrade your home needs. Unlike older mechanical thermostats that simply turn your HVAC system on and off, the T5 learns your preferences, adapts to your schedule, and lets you manage your home’s temperature from anywhere, all while cutting energy waste. For homeowners and DIY enthusiasts looking to modernize their climate control setup without hiring a contractor, understanding what the T5 offers and how to install it properly makes the difference between a smooth upgrade and frustrating compatibility headaches. This guide walks you through the essentials so you can take control of your comfort and energy costs.
Table of Contents
ToggleKey Takeaways
- The T5 smart thermostat delivers 10–15% annual energy savings by learning your preferences and automatically adjusting heating and cooling cycles without manual intervention.
- Installation is straightforward for most DIY homeowners with basic electrical knowledge—verify your wiring setup, use the included C-wire adapter if needed, and avoid placing the device near heat sources or direct sunlight.
- Geofencing and learning capabilities enable the T5 to switch to Away mode automatically when you leave home and warm up before you return, eliminating the waste of conditioning an empty house.
- Remote smartphone control lets you adjust your home’s temperature from anywhere, while detailed energy reports show exactly when and why your HVAC system runs.
- Maximize savings by setting realistic away temperatures (3–4°F setback in winter), pairing the T5 with smart vents for room zoning, and enabling automatic firmware updates for new features.
- Avoid common mistakes—ensure wires are fully seated in terminals, follow your HVAC system’s documentation, and mount the T5 in a neutral location away from drafts and heat sources.
What Is The T5 Smart Thermostat And Why You Should Care
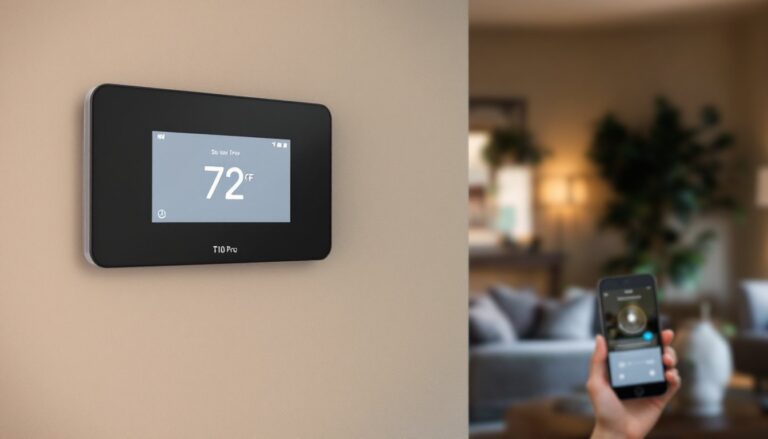
The T5 smart thermostat is a WiFi-enabled device that replaces your existing wall-mounted thermostat and communicates with your furnace, air conditioner, and heat pump to regulate your home’s temperature intelligently. Unlike basic programmable models from the 1990s, the T5 connects to your home network, learns when you’re home or away, and automatically adjusts heating and cooling without you lifting a finger.
What makes it worth your attention is the real-world impact on your wallet. Homeowners typically see 10–15% annual energy savings by letting the T5 optimize heating and cooling cycles during off-peak hours and when nobody’s home. If your current thermostat is older, the difference is even more dramatic. The T5 also eliminates the guesswork: you get detailed energy reports showing exactly when and why your HVAC system runs, so you’re not blindly paying for comfort.
From a DIY perspective, installation is straightforward enough for most homeowners with basic electrical knowledge. You don’t need to hire an HVAC technician unless your wiring is non-standard or your system requires professional recalibration. That translates to savings on service calls and the satisfaction of handling the job yourself.
Key Features That Make The T5 Stand Out
The T5 packs several capabilities that set it apart from basic programmable thermostats and even some competing smart models.
Learning capability is perhaps the biggest draw. The T5 observes your temperature preferences and schedules over the first week or two, then automatically creates an optimized routine. If you lower the temperature by 2°F at 9 p.m. every night, the T5 starts doing it on its own, no manual scheduling required.
Geofencing uses your smartphone’s location to know when you’re leaving or arriving home. Your T5 can switch to energy-saving mode when the last person leaves and warm up the house 30 minutes before everyone returns. This alone eliminates the waste of conditioning an empty home.
Multi-stage heating and cooling support means the T5 works with standard furnaces, air conditioners, heat pumps, and even systems with auxiliary heating. You won’t hit a compatibility wall during installation (though always verify your specific setup beforehand).
Energy reports break down your heating and cooling usage by day, week, and month, plus compare your performance to similar homes in your climate zone. According to recent smart home technology news from Digital Trends, transparency on energy use drives behavioral change, people who see their consumption data tend to adjust habits and keep efficiency gains long-term.
The interface is simple enough that any household member can adjust the temperature from the app or the wall display without confusion. No cryptic button sequences or buried menus.
Installation And Setup: Getting Your T5 Up And Running
Before you unbox the T5, turn off power to your current thermostat at the breaker panel. Modern thermostats carry only low-voltage power (usually 24V from a transformer), but mistakes happen, and safety comes first.
Remove your old thermostat and photograph or label the wires. Thermostats typically have wires for:
- R (Red): Power from the transformer
- C (Common): Return path (may not exist in older systems)
- W (White): Heat
- Y (Yellow): Cooling
- G (Green): Fan
- O/B (Orange/Blue): Reversing valve for heat pumps
The T5 usually comes with a common wire adapter (also called a C-wire bridge) if your system lacks a dedicated common wire. This adapter uses the G (fan) wire to complete the circuit, though it reduces standalone fan control. Check the T5’s manual for your specific wiring setup, a mismatch is the number-one installation mistake.
Once wires are in place, mount the T5’s wall plate level using the included anchors and screws. Avoid installing directly above heat sources, in direct sunlight, or next to cold drafts, all skew temperature readings. Connect wires to the labeled terminals, making sure they’re seated firmly.
Turn the breaker back on and follow the on-screen setup wizard. The T5 will guide you through selecting your system type (heat/cool, heat pump, etc.), temperature preferences, and WiFi connection.
Smartphone Control And Remote Management
Once the T5 is online, download the app and create an account. This is where the T5 shines: adjusting your home’s temperature from the office, beach, or anywhere with internet is instant and effortless. The app also sends alerts if the temperature swings beyond your set range, useful for catching furnace failures or burst pipes early.
Set up geofencing in the app by allowing location permissions. The T5 will detect when the last person leaves and switch to Away mode (usually 2–3 degrees warmer in summer, cooler in winter) automatically. No schedule needed.
Maximizing Energy Savings With Smart Scheduling
While the T5’s learning feature handles routine adjustments, you can amplify savings with intentional schedules and settings.
Set a realistic away temperature. If you’re gone 8 hours on a winter workday, a 3–4°F setback saves significant energy without straining the system when you return. In summer, raising the temperature by 4°F while nobody’s home (say, 78°F instead of 74°F) cuts cooling runtime substantially.
Use the smart schedule feature to define different comfort levels by day of the week. Many households have a weekday routine (lower temps during work hours, higher when home) that differs from weekends. Let the T5 automate this instead of remembering to adjust manually.
Avoid short temperature swings. Jumping from 72°F to 68°F and back repeatedly stresses the HVAC system and wastes energy. Gradual, sustained adjustments are more efficient.
Pair the T5 with smart vents (if your system supports them) to zone different rooms. This prevents heating or cooling rooms you’re not using. Independent thermostats reviews on CNET consistently note that smart thermostats paired with zoning see the highest energy reductions.
Check the energy report weekly during the first month. The T5 shows exactly when and why your system ran. If your furnace cycles excessively or cooling runs during night hours when it shouldn’t, you’ve spotted a tuning opportunity or a potential system issue.
Common Setup Mistakes To Avoid
Missing or loose wires are the most common culprit. Double-check that every wire is pushed all the way into its terminal until you hear or feel a click. A partially seated wire will cause the T5 to lose power intermittently.
Installing the wrong C-wire adapter for your system is another trap. Some systems need the full adapter: others can skip it if a common wire already exists. Read your manual, guessing wastes time and risks compatibility issues.
Mounting in a bad location undermines the T5’s learning ability. Never place it next to a sunny window, above a heat register, or near an exterior door. Temperature sensors need to read the actual living space, not a heat source or draft.
Forgetting the WiFi credentials means the T5 won’t connect to the app, eliminating its remote control and learning advantages. Have your WiFi password handy before setup.
Ignoring your HVAC system’s documentation is risky. Some older furnaces or heat pumps have unusual wiring or safety interlocks the T5 manual doesn’t address. A 10-minute phone call to your HVAC manufacturer or a quick email to their support team can save hours of troubleshooting.
Skipping firmware updates leaves you without bug fixes and new features. Enable automatic updates in the T5 app, or manually check monthly for new versions.
According to smart home buying guides from Tom’s Guide, users who invest 15 minutes reviewing their system specs and following the manual step-by-step have a 95% success rate on first install. Rushing cuts that to about 70%.
Conclusion
The T5 smart thermostat delivers genuine convenience and measurable savings for DIY homeowners willing to spend an hour on installation. If your wiring is standard and your HVAC system is documented, you’ll have a fully functioning smart climate control setup without a service call. The real payoff comes from letting the T5 learn your habits and geofencing your absence, those two features alone justify the upgrade for most households. Start with realistic away temperatures, monitor the energy reports, and let the system settle into its rhythm. In a few weeks, you’ll see the pattern: lower bills, better comfort, and one fewer thing to think about every day.