Installing a Yale smart lock transforms your home’s security and convenience in one afternoon. Whether you’re upgrading from a traditional deadbolt or adding keyless entry to a rental property, understanding the setup process upfront prevents frustration later. This guide walks you through installation, app integration, user management, and troubleshooting, straight from the manual, without the jargon. You’ll learn what to expect before drilling your first hole, how to avoid common pitfalls, and how to keep your lock running smoothly for years. Consider this your neighbor’s perspective on getting a Yale smart lock working right the first time.
Table of Contents
ToggleKey Takeaways
- A Yale smart lock manual emphasizes pre-installation checks, including door thickness measurement and deadbolt hole positioning at 2-3/8 inches above the knob, to prevent installation errors and ensure smooth operation.
- Proper installation requires drilling precise holes (2-1/8 inch face hole and 1-1/8 inch edge hole), careful bracket alignment, and strike plate positioning to avoid latch binding and operational issues.
- After hardware installation, connect your Yale smart lock to the mobile app via Bluetooth within 3 feet, using the 6-character pairing code found on the battery cover, and consider a Wi-Fi hub for remote access beyond Bluetooth range.
- Create unique, non-sequential PIN codes for family, guests, and service professionals with optional expiration dates, allowing you to revoke access remotely and audit all lock entries for security.
- Battery issues account for roughly 60% of Yale smart lock problems; replace alkaline batteries annually, use quality brands to avoid corrosion, and test remote unlock monthly to catch connectivity issues early.
- Maintain your Yale smart lock by keeping the deadbolt hole and strike plate debris-free, using only dry lubricants like graphite powder, sealing the battery cover tightly on exterior doors, and enabling automatic firmware updates for security patches.
Getting Started With Your Yale Smart Lock
What’s in the Box and Pre-Installation Checklist
Before you break out your drill, unpack everything and lay it out. A typical Yale smart lock kit includes the deadbolt body, interior assembly, exterior cover plate, mounting brackets, and a set of installation screws in multiple sizes. You’ll also find a user manual, a small Level or shim, and often a reconnection tool for the interior lever. Check that nothing arrived damaged: scratches on the finish or a stuck latch mean a return trip before installation.
Inspect your door frame next. Measure the thickness, standard residential doors are 1-3/8 inches thick, but some solid wood or metal doors run thicker. Lay a straightedge across the door edge to check if it’s flat: twisted or warped doors cause binding and operational headaches. The deadbolt hole position matters too: it should sit 2-3/8 inches up from the knob center (called the “standard” height in most building codes). If your door is pre-drilled for a standard bolt, you’re ahead. If not, you’ll be drilling a 2-1/8 inch hole through the face and a 1-1/8 inch hole through the edge. A spade bit works fine, but a hole saw and drill press give a cleaner result with less wobble, especially if you’re tackling multiple doors.
Gather your tools: power drill, spade bits or hole saw, screwdriver (Phillips and flat-head), measuring tape, pencil, and a level. Add safety gear, safety glasses and work gloves, because metal shavings and tight spaces aren’t kind to bare hands and eyes. Some installations benefit from a second pair of hands to hold the lock body steady while you align the screws, particularly on thick doors.
Step-by-Step Installation Instructions
Start by disassembling your existing deadbolt if one’s in place. Remove interior trim, unscrew the retaining bolts, and slide the old lock out. Clean out any debris and measure the new hole positions against your Yale lock template, usually a cardboard sheet that comes in the box.
-
Mark and drill the face hole. Use the template to pencil mark the center point for the 2-1/8 inch deadbolt hole. Drill slowly from both sides (start on one face, finish from the other) to prevent splintering. Clamp a scrap block behind the exit side if your door is solid wood.
-
Drill the edge hole. Mark the 1-1/8 inch hole on the door’s edge, 2-3/8 inches above the knob hole if both exist. This holds the latch bolt itself. A spade bit or hole saw works: go slow so the bit doesn’t grab.
-
Install the exterior lock body. Insert the deadbolt assembly from outside, aligning the latch with the edge hole. The strike plate alignment, how the bolt hits the frame’s keeper, determines smooth operation. Slide the body in until the mounting plate sits flush against the door face.
-
Secure the mounting brackets. Yale locks use a set of brackets or bolts that run from inside the door to anchor the exterior body. Thread these bolts through the interior mounting plate and tighten snugly, but don’t overtighten, you’ll strip threads or bend the bracket. A loose bolt causes the lock to rattle and shift under stress.
-
Attach the interior assembly. The interior knob or lever slides onto a spindle that runs through the door. Align it with the exterior body, check that it operates smoothly, then screw it down. Test the latch: it should snap shut with a crisp click and retract cleanly when you turn the interior knob.
-
Install the strike plate on the doorframe. Position the frame-side strike so the bolt slides in without binding. An easy test is to apply lipstick or marker to the bolt, close the door, and watch where it marks the frame. Sand or chisel the strike opening slightly if needed: a misaligned strike causes the bolt to resist or jam during lock cycles. Yale recommends a 3/4-inch throw bolt for standard residential use, so ensure your strike matches that depth.
Connecting Your Lock to the Yale App and Mobile Controls
Once the hardware is rock-solid, it’s time to bring the smart features online. Download the Yale Access app from Apple App Store or Google Play. Create an account, then hit the “Add Device” button and select your lock model, Yale offers models like the Real Living line, which integrate via Bluetooth or Wi-Fi with a hub.
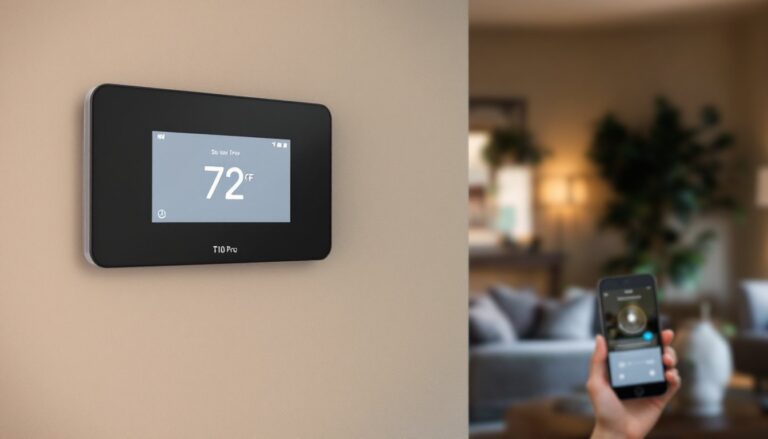
The first pairing happens via Bluetooth at close range (stay within 3 feet during setup). Open the lock’s battery cover and note the 6-character pairing code, usually printed on a sticker inside. The app will prompt you to enter this code. If pairing stalls, restart the app and re-check that Bluetooth is enabled on your phone, a common snag that sounds harder than it is.
Next, assign the lock to a location or room in the app. This helps when you have multiple locks or if you’re managing access for a rental property across several units. Name it something descriptive like “Front Door” or “Unit 2B,” not just “Lock 1.” If your Yale lock supports Wi-Fi or Z-Wave integration, you’ll need a compatible hub (sometimes sold separately). These hubs sit on your home network and extend control beyond Bluetooth range, letting you lock or unlock remotely, crucial for letting in contractors or guests when you’re not home.
Test remote access before relying on it. Lock and unlock from the app while standing next to the door to confirm the command goes through. Latency ranges from instant to a few seconds depending on network conditions and hub distance. Expect occasional lag if the hub is far from the door or in a high-interference area.
Managing Access and Creating User Codes
One major advantage of a Yale smart lock is the ability to issue temporary access codes to family, guests, or service professionals without handing over a key. In the app, select your lock and tap “Users” or “Codes.” Create a new entry, assign a PIN (typically 4 to 8 digits), and set an expiration date if needed.
For example, a plumber coming to fix a leak gets a code valid only for that day. A housesitter during vacation gets a 2-week window. The lock records every unlock, both app-based and code-based, so you can audit who came in and when. This transparency is invaluable for rental properties or shared living situations.
Best practice: avoid sequential or obvious PINs like “1234” or birthdays. Mix numbers, and change admin credentials regularly, especially if a renter or employee leaves. Some Yale models let you disable a code remotely without re-keying the entire lock, a game-changer for security. Some Yale models support keypad-only entry (no app required), useful if tech isn’t your strong suit. But, keypad-only locks can’t offer remote unlock capability, so weigh convenience against security and integration with your smart home setup. The manual spells out which features apply to your specific model, so reference that before assuming all features are available.
Common Issues and Troubleshooting Solutions
Even a well-installed lock can hit hiccups. Here’s how to handle the most frequent problems without calling service.
Lock won’t operate with the keypad or app. First, check the battery. Yale smart locks run on AA or AAA batteries (model-dependent): a low battery drains unexpectedly after a few years or heavy use. Pop the cover, swap in fresh alkaline batteries, and test. If the lock still won’t respond, restart the app and ensure Bluetooth is on. A hard reset of the lock itself (documented in your manual) sometimes clears a frozen state, usually by holding a reset button for 10 seconds. According to detailed reviews like the Yale Real Living Key Free Touchscreen Deadbolt, battery issues account for roughly 60% of reported problems.
Latch jams or sticks partway. This typically means the strike plate is misaligned or the latch is binding inside the door. Close the door and apply slight pressure: if the bolt catches, the strike opening is too small. Mark the contact point with a pencil and chisel or file the strike hole slightly larger. Alternatively, loosen the strike and shift it up or down a quarter-inch. Test again.
App won’t connect or hub is unreachable. Check that your Wi-Fi hub is powered and connected to your network (check its indicator lights). Walk the hub closer to the door temporarily to test signal strength. If connection improves, move the hub to a more central location in your home. Some walls or appliances (microwaves, fridges) interfere with 2.4 GHz signals: moving the hub away from those helps. Restart the hub by unplugging for 30 seconds.
Codes aren’t working. Verify the code hasn’t expired in the app. Some locks require a brief pause between digits: press slowly if you’re entering a PIN on a keypad. If a code worked before and doesn’t now, re-check the user’s permission level in the app, some admin changes accidentally revoke access.
Door opens unexpectedly or locks itself randomly. This is rare but suggests a Wi-Fi communication glitch or interference. Disable Wi-Fi features temporarily and rely on Bluetooth or manual locks to confirm the hardware itself isn’t faulty. Contact Yale support if the problem persists: it could indicate a defective solenoid or motor.
Maintenance Tips and Best Practices
A Yale smart lock is more robust than most people expect, but a few habits extend its life.
Battery management. Replace batteries annually if you use the keypad or remote unlock regularly. Mark the date on a calendar so you don’t get caught with a dead lock mid-winter. Alkaline batteries last longer than rechargeable NiMH types in smart locks because the drain is irregular and unpredictable. Buy quality brands: cheap batteries leak and corrode contacts.
Lubrication and cleaning. Don’t oil the lock mechanism directly, grit sticks to oil and gums up the works. Instead, keep the deadbolt hole and strike free of debris. A dry lubricant like powdered graphite (applied as a light puff from a small bottle) keeps the latch moving smoothly without attracting dust. Clean the exterior cover plate with a damp cloth: avoid harsh chemicals that dull or discolor the finish.
Weather sealing. If your lock sits on an exterior door exposed to rain, ensure the battery cover is sealed tightly. Some models include a gasket: check it’s in place. Salt spray near coastal properties speeds corrosion: rinse the lock with fresh water occasionally if you’re in a salty climate.
Firmware updates. Yale periodically releases app and lock firmware updates that improve security and fix bugs. Enable automatic updates in the app settings, or check manually every few months. Outdated firmware can create security gaps or compatibility issues with newer hubs. Resources like CNET and Digital Trends frequently cover smart lock security updates, so staying informed helps you catch critical patches early.
Testing and documentation. Test your lock’s remote unlock function monthly to catch connection issues before you actually need it. Keep a written list of active user codes and their expiration dates, especially for rental properties, this prevents lockouts and simplifies audits.
By sticking to these routines, you’ll avoid expensive repair calls and keep your lock running as reliably as a mechanical deadbolt, with the added convenience of keyless entry.